
Table Builder Interface
Interface Layout
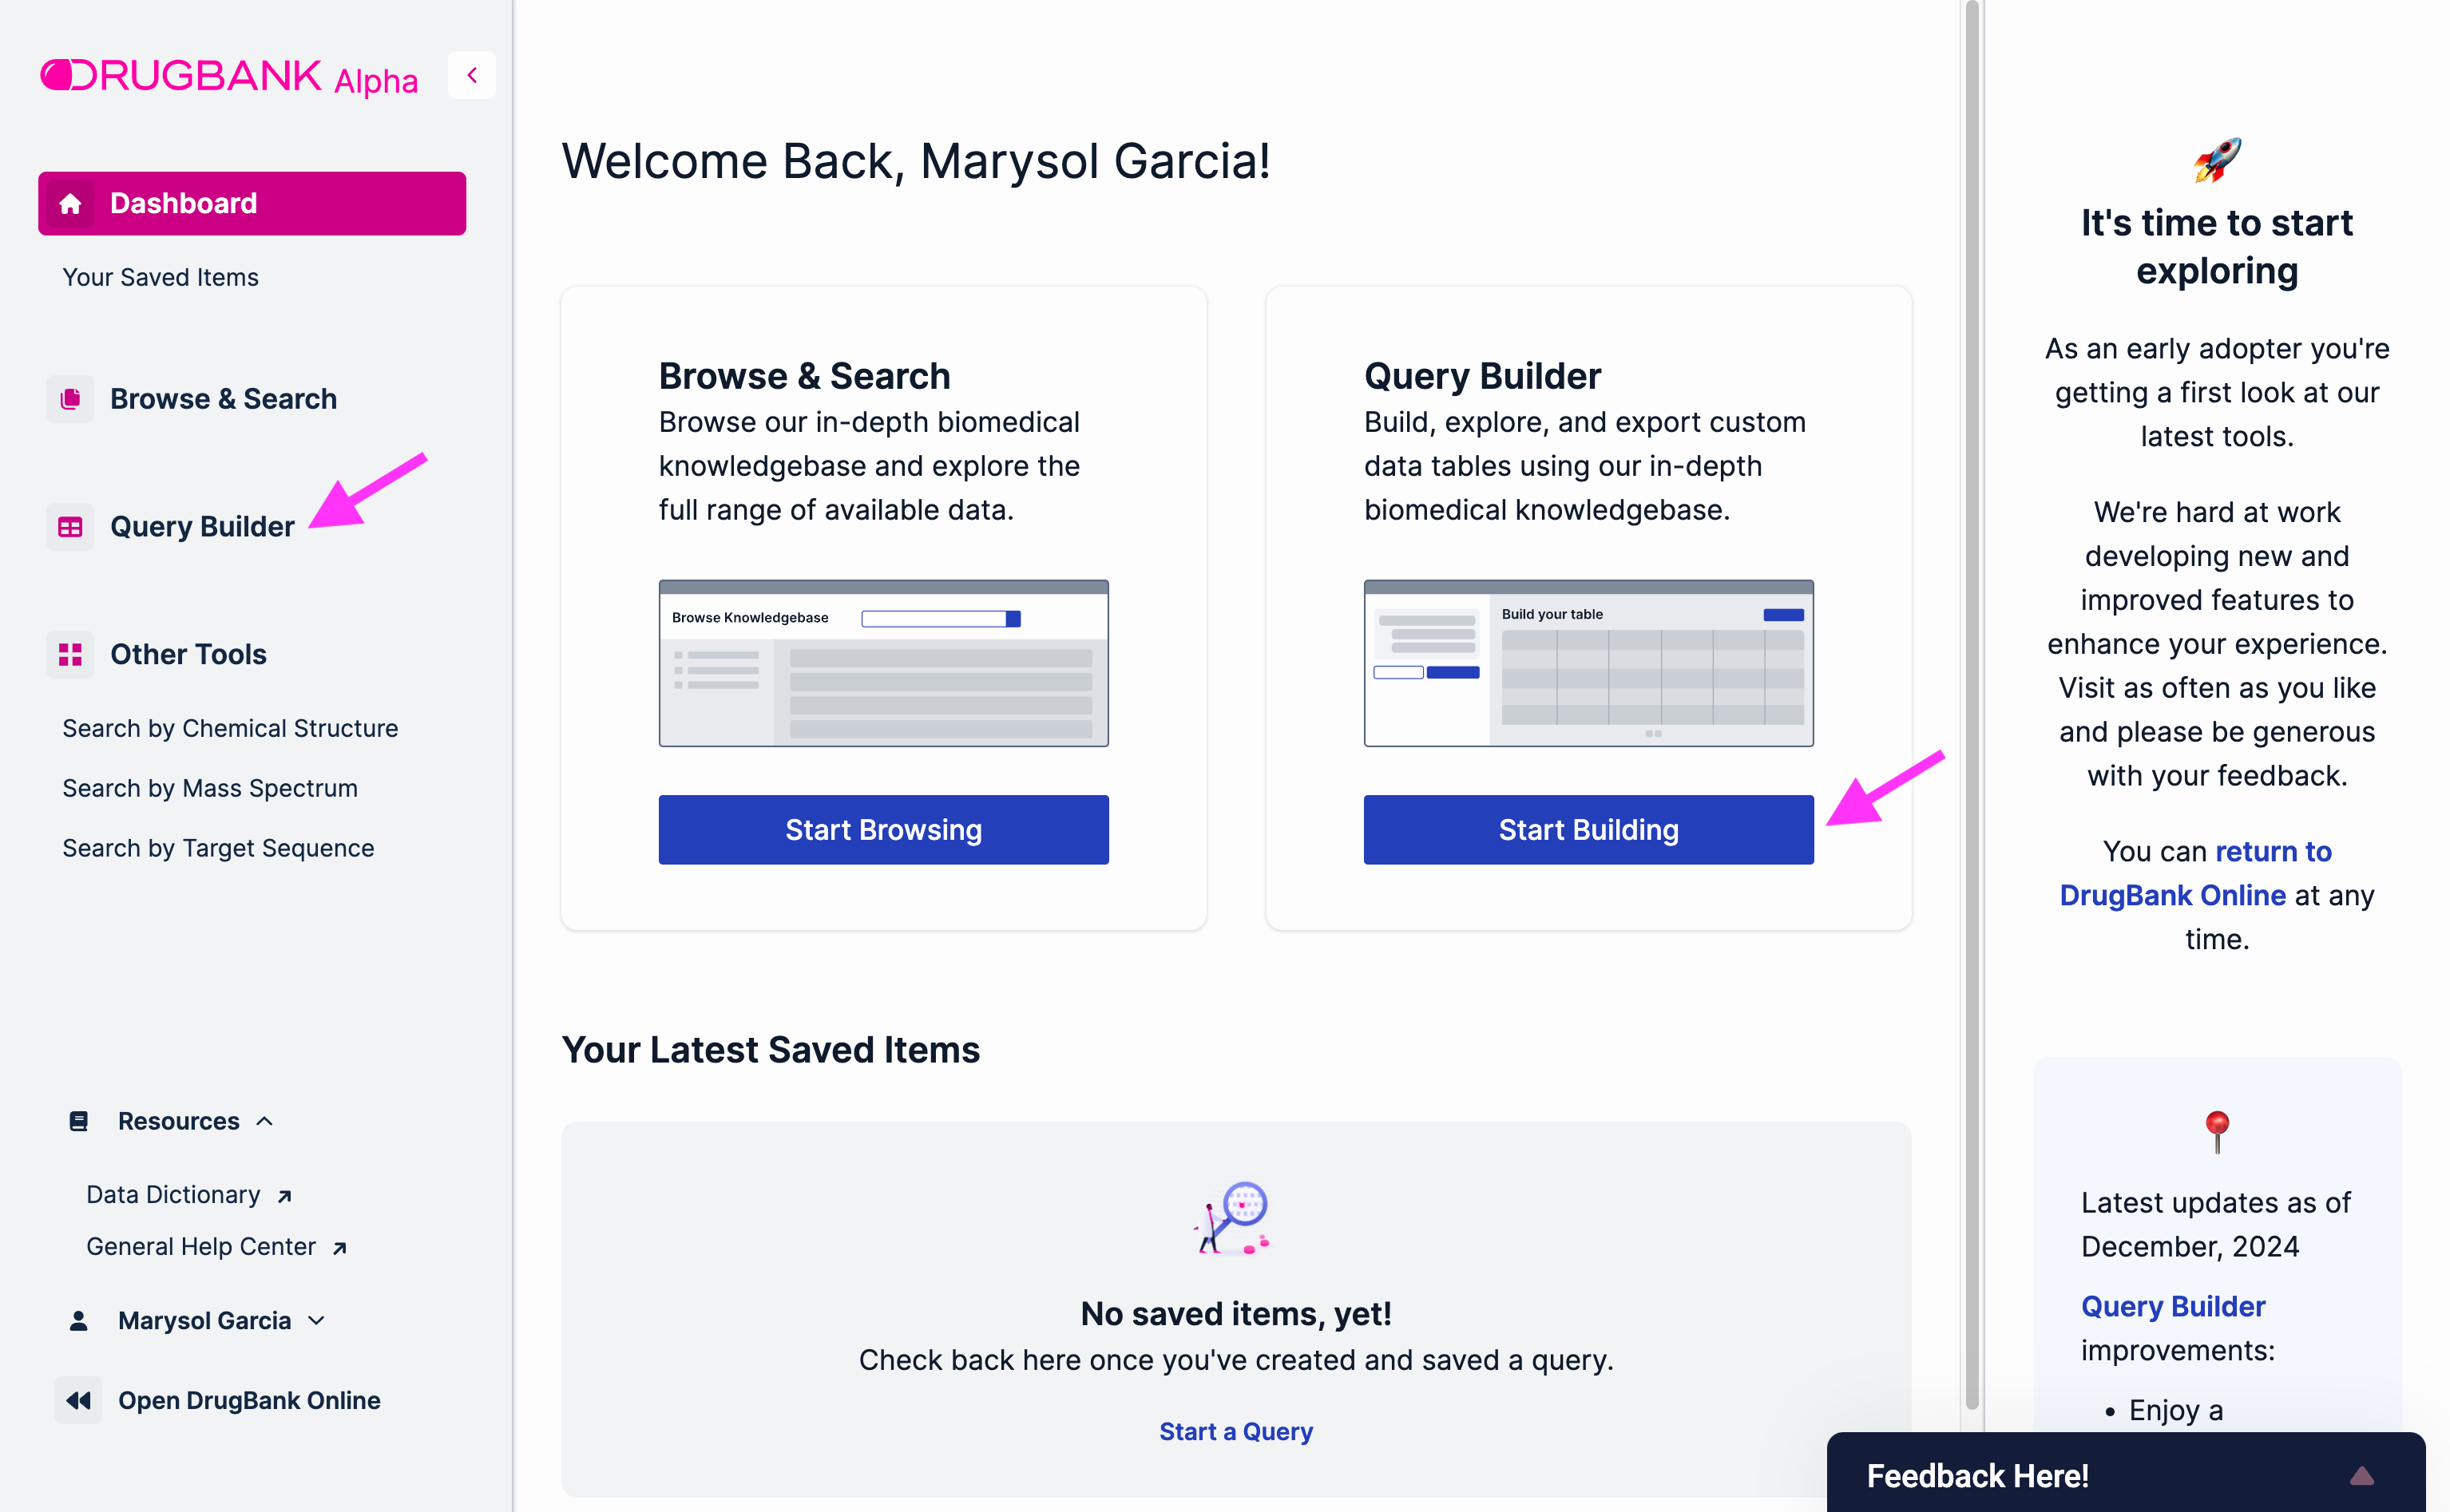
To access the DrugBank Table Builder, click on the “Start Building” button on the landing page or expand the collapsible sidebar and click on “Table Builder”:
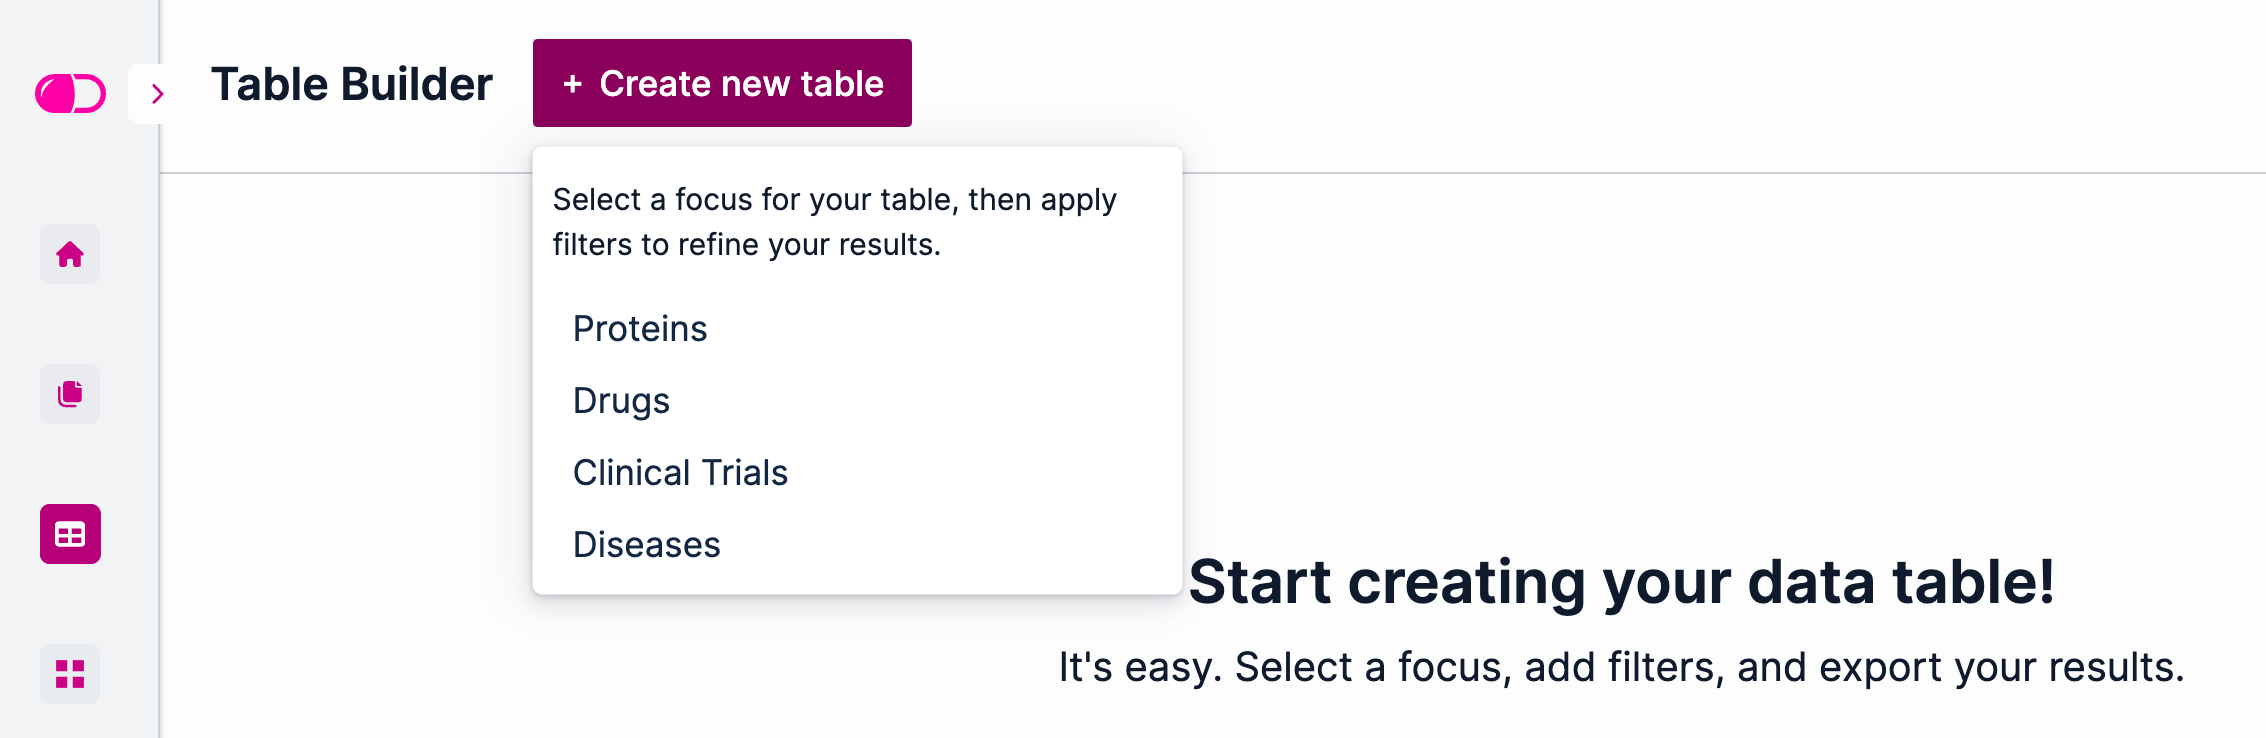
Then, click on the “Create new table” button. This opens a drop-down with the different types of tables that can be created using the Table Builder:
Proteins
Drugs
Clinical Trials
Diseases
Creating a New Table
Users can create tables starting from different points, while still being able to connect to other types of data. For instance, one can create a new Drugs table, filter out the ones binding to a specific target of interest and add a column that includes the number of clinical trials in each phase for each drug. The sections below dig deeper into the types of columns and filters that can be applied to each table and their functionality. Here, we provide a general overview of how to navigate those features.
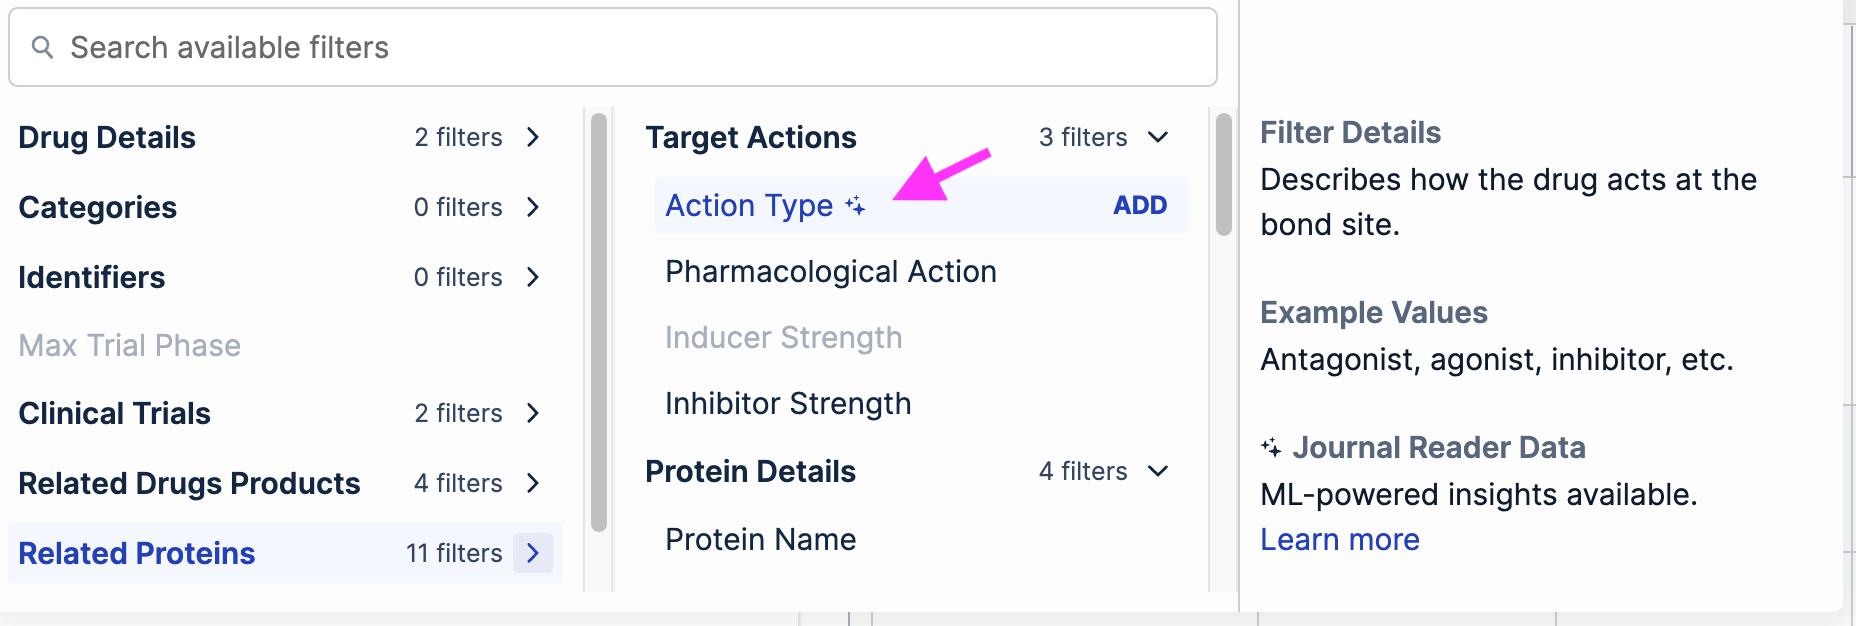
Users can modify their tables by adding filters and adding/removing columns. To add a filter click on the “Add Filter +” button. This will open a Filter menu that can be searched by going over each of the Filter categories (e.g. Related Drug Products in the example below) or by typing the name of the filter on the search bar at the top:
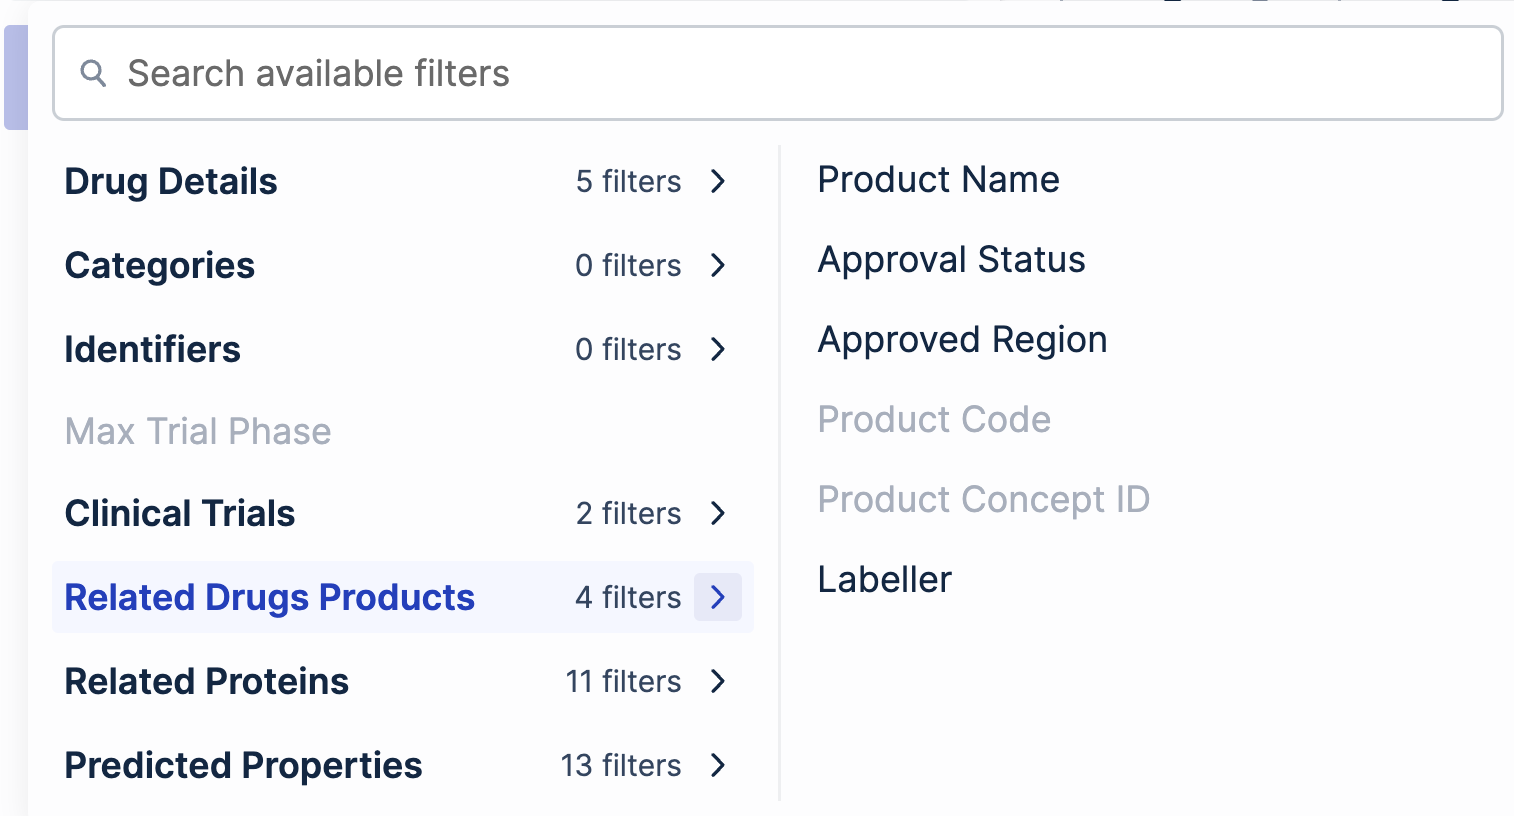
By hovering the mouse pointer over any of the filters, users can obtain a brief description and example values. Once a filter has been selected, users can select the value they want to include or exclude in their table. Moreover, by adding several filters, data can be further refined, making it easier to process. Once all filters have been selected, click the “Apply Filters” button at the bottom.
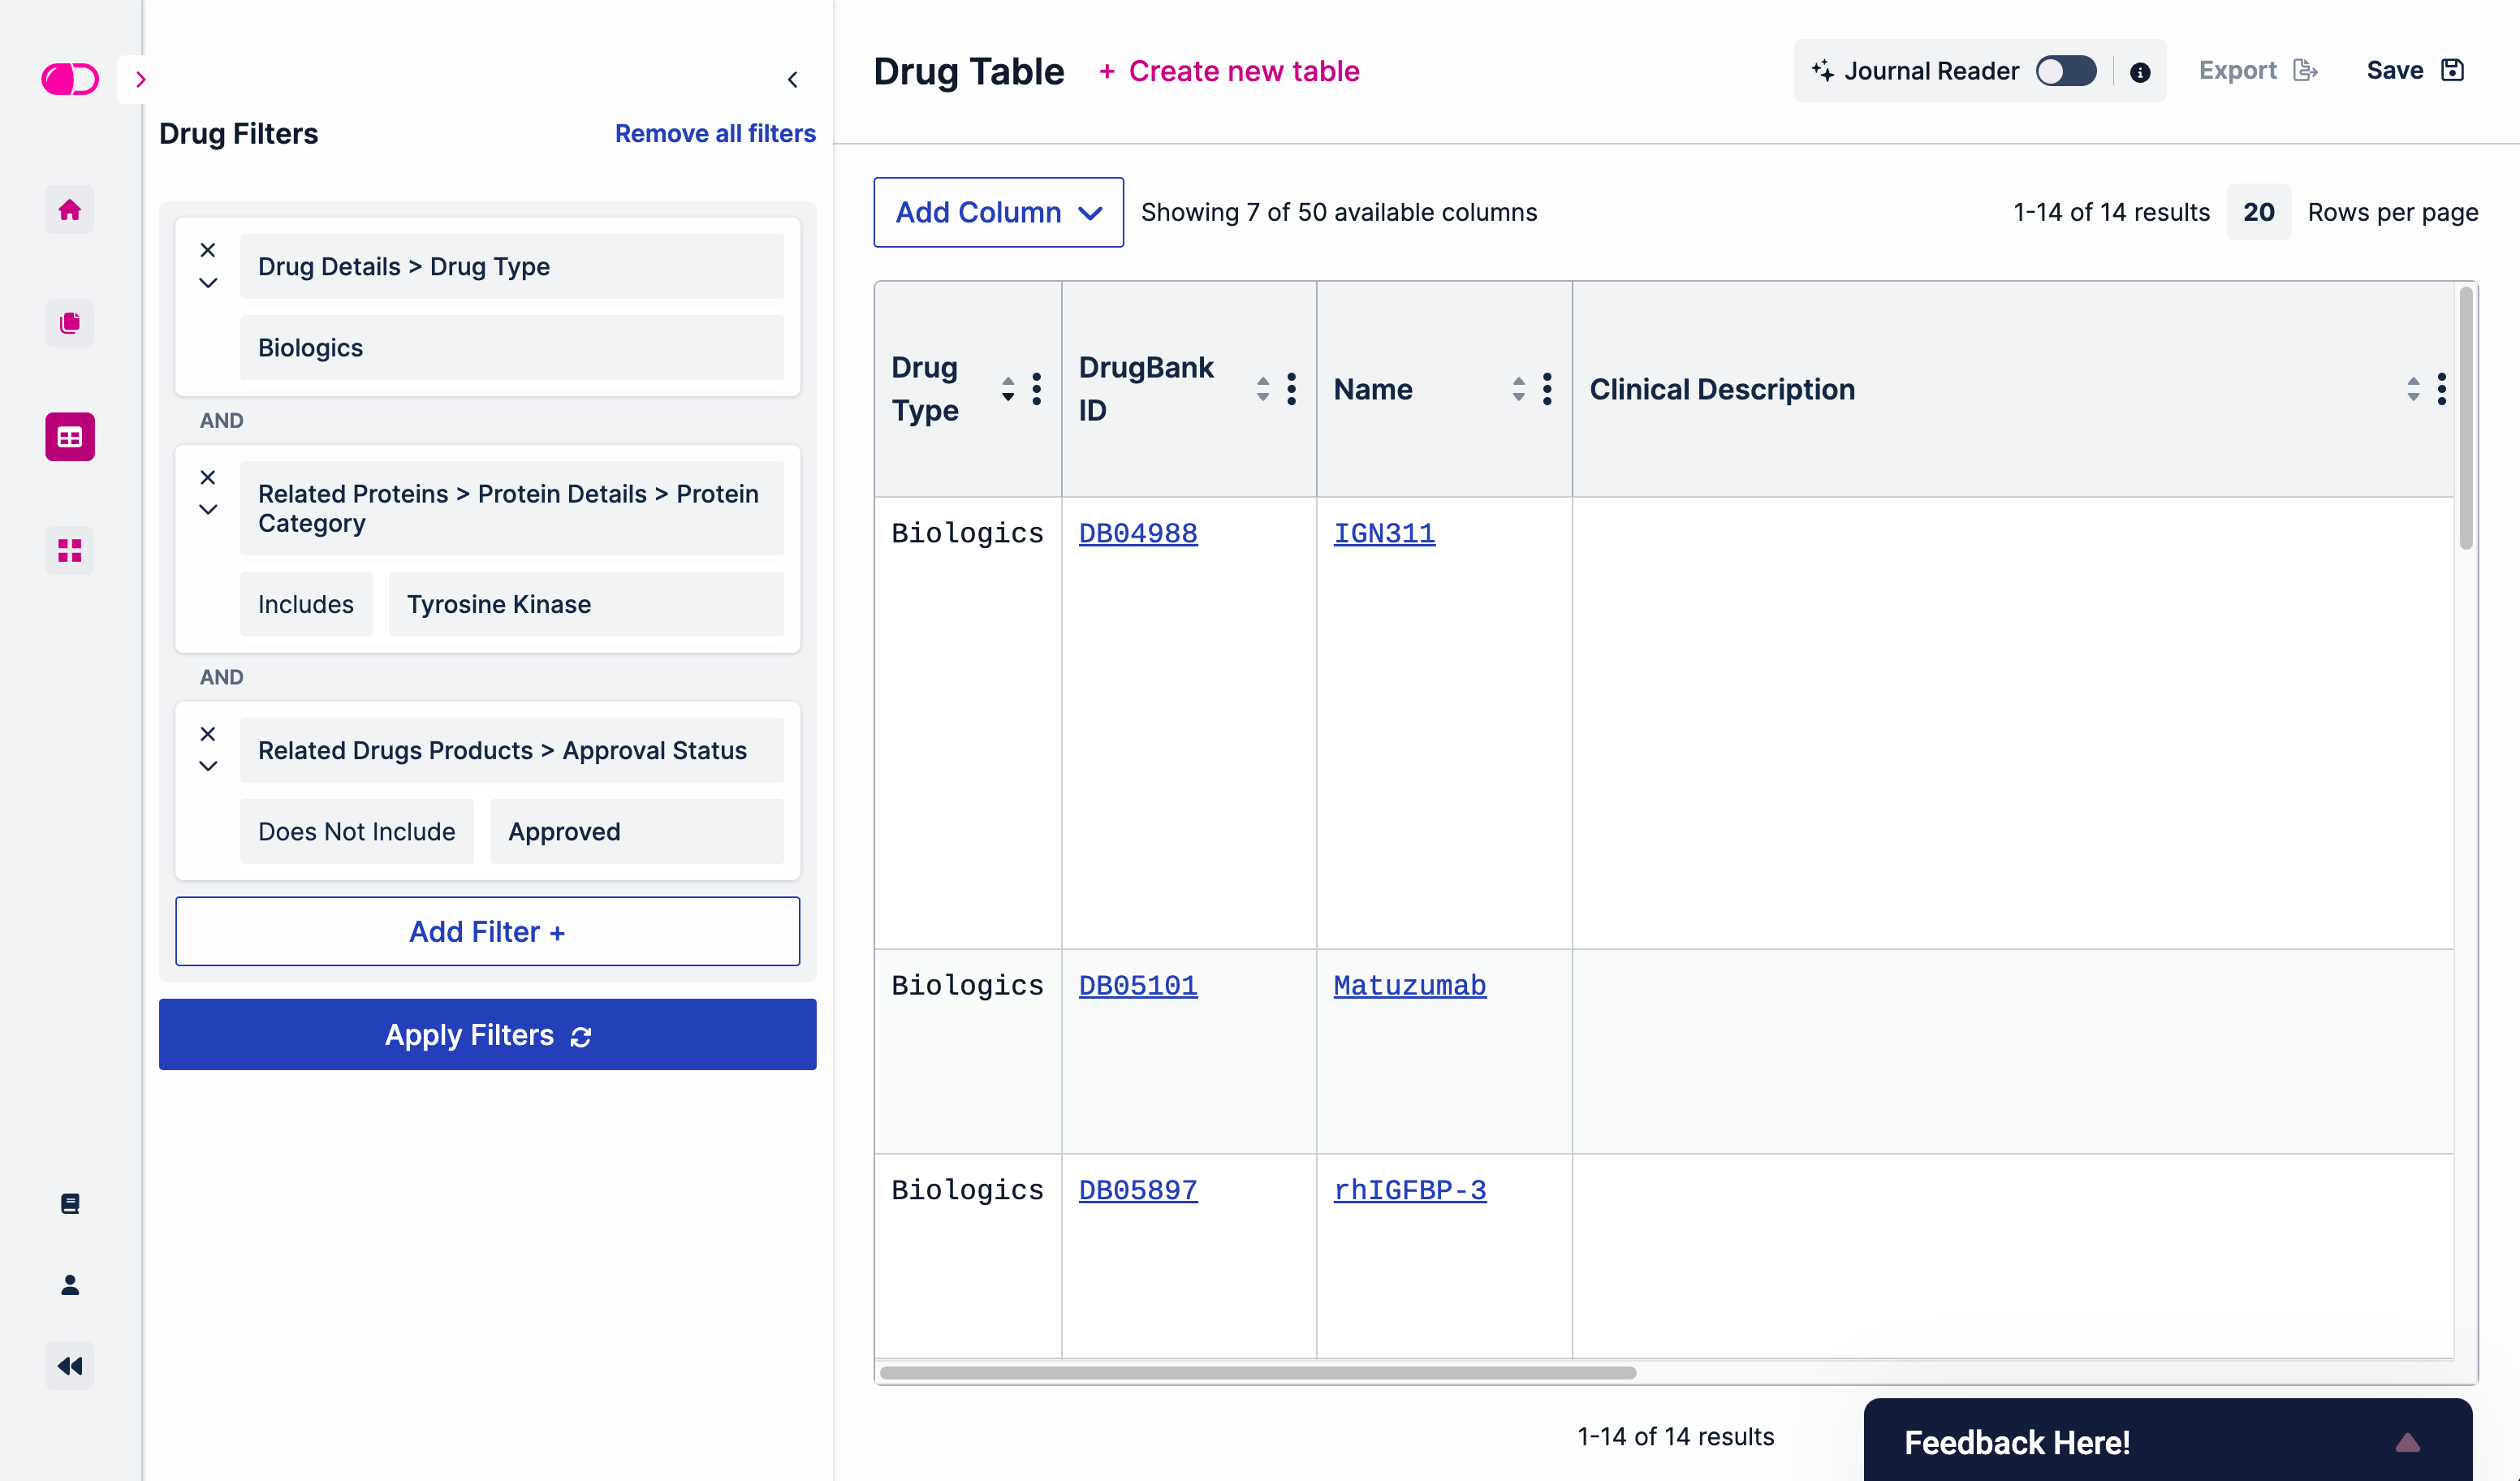
As an example, consider to following scenario: To obtain a table that lists biologic drugs that target a tyrosine kinase and have not been yet approved, we would select the following filters:
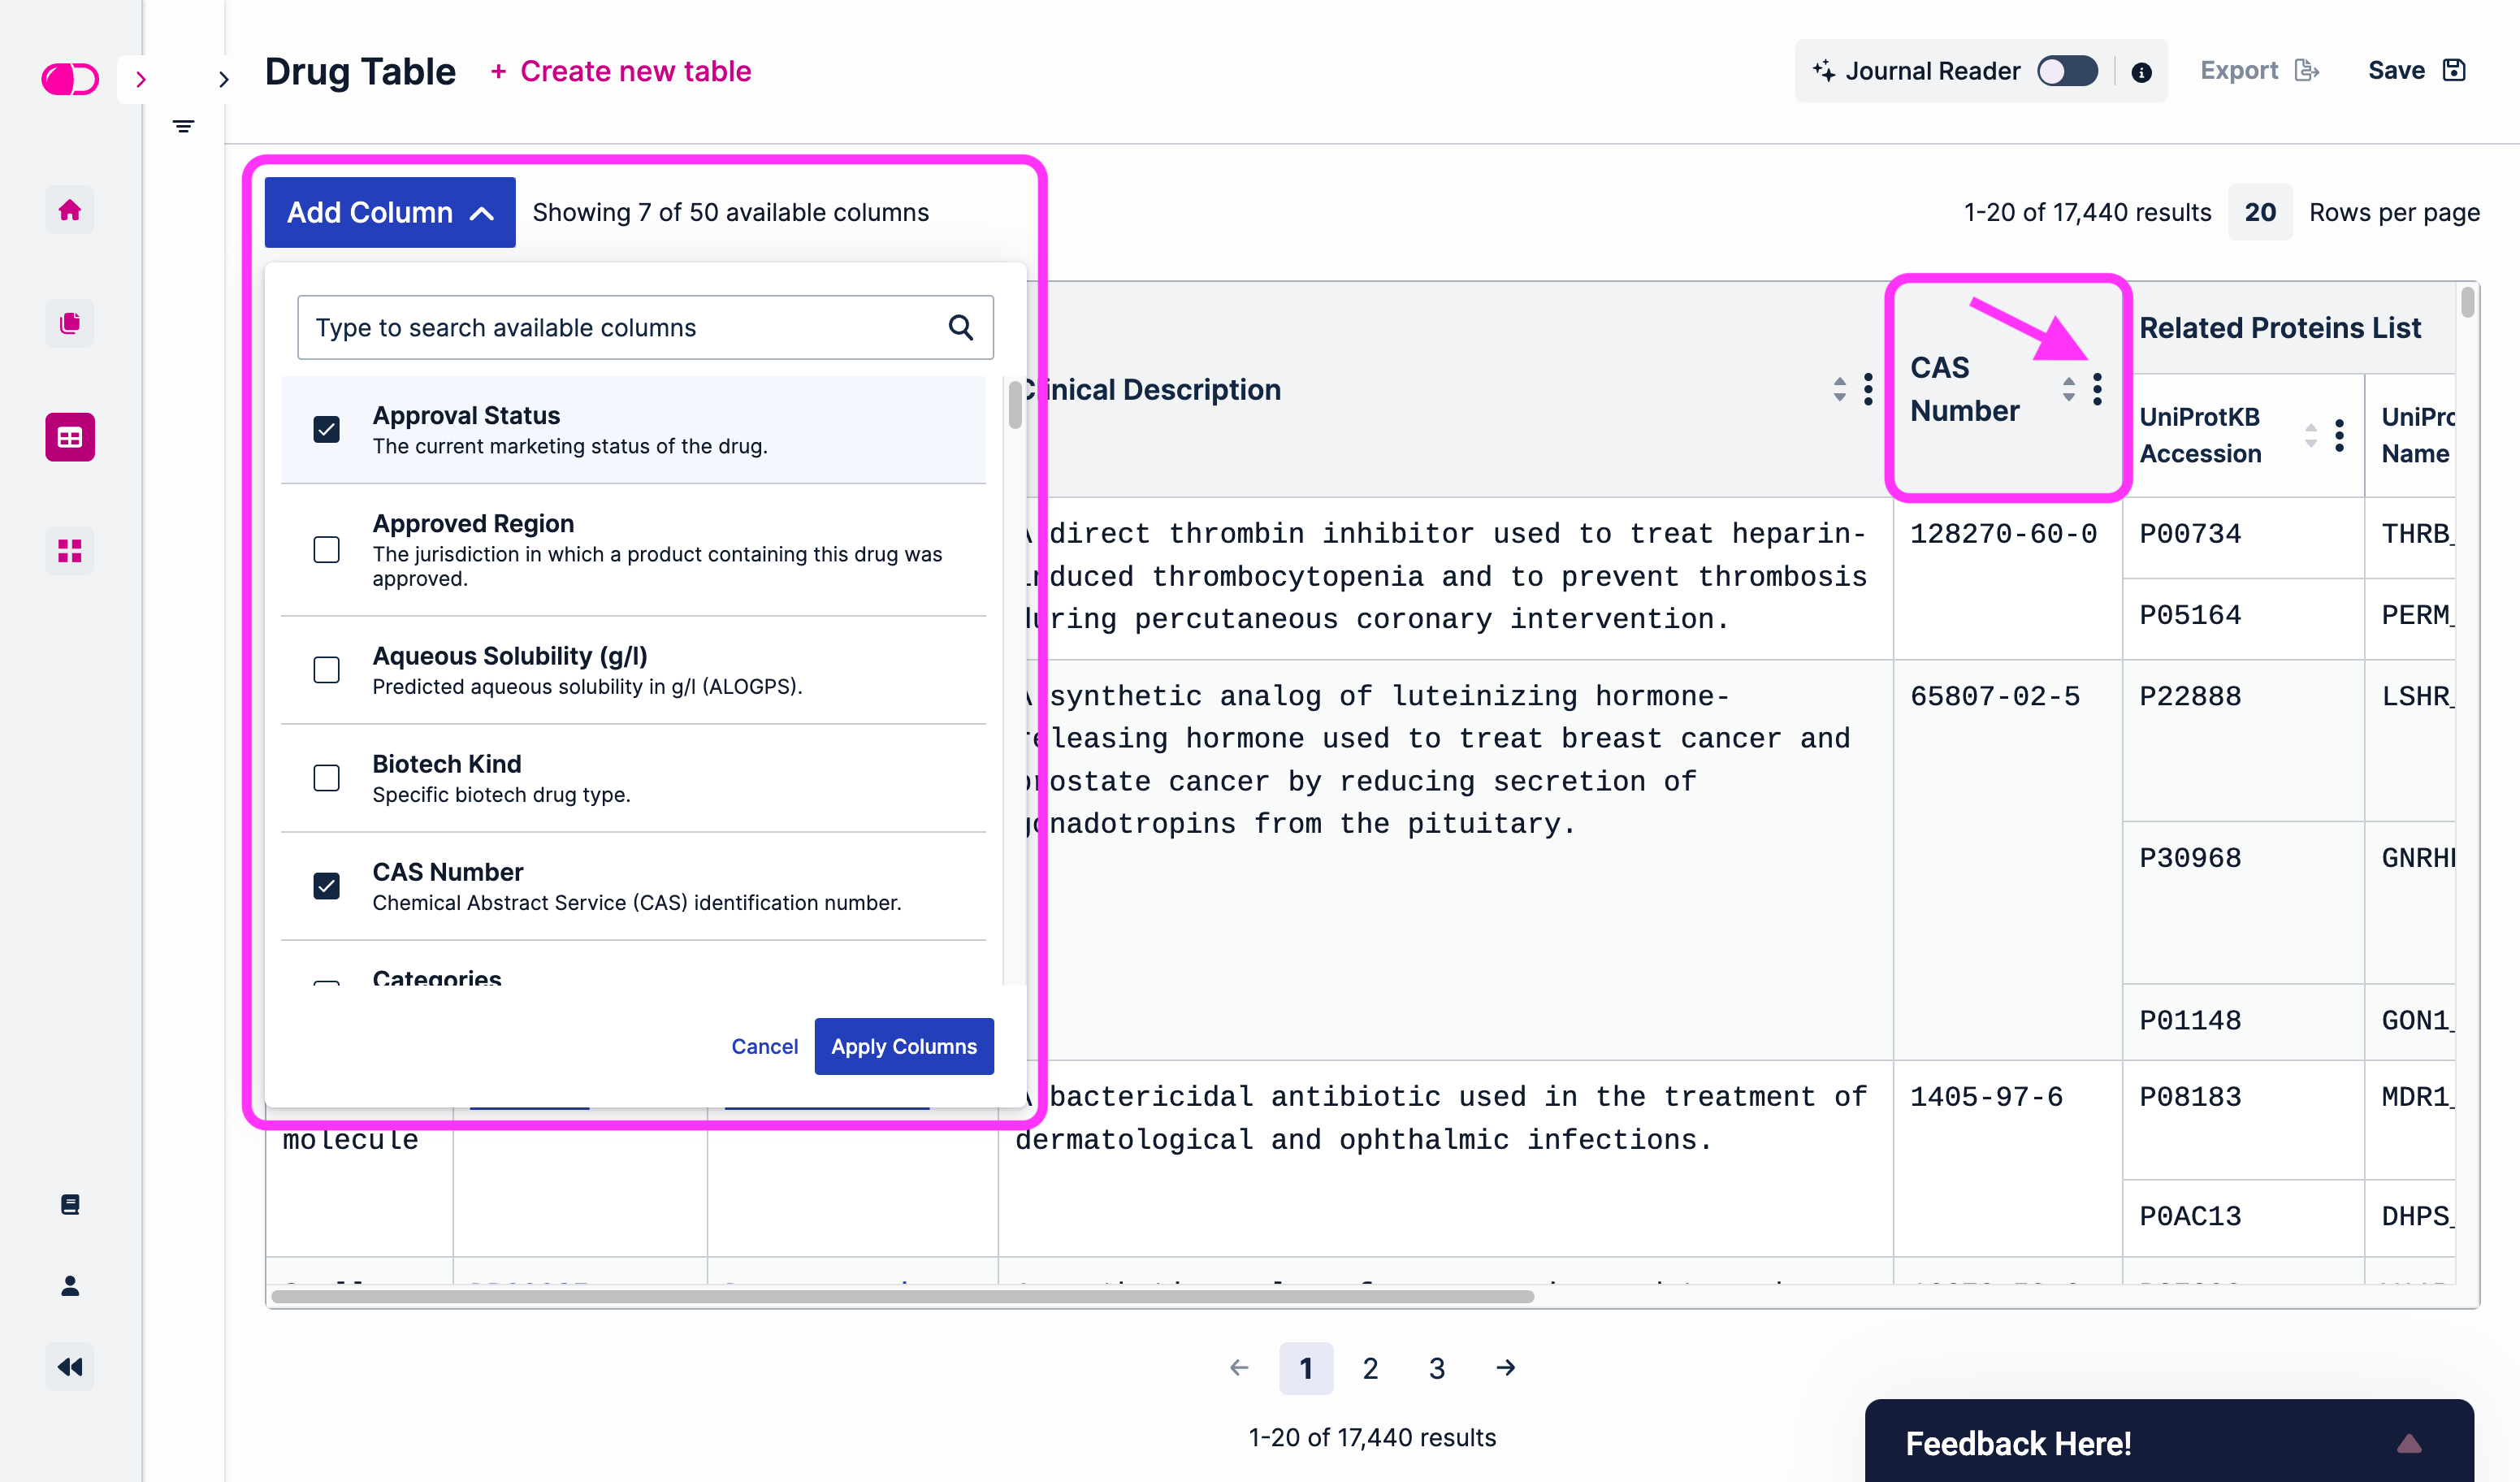
To modify the information in a table, users can add columns using the “Add Column” button at the top of the table or remove them using the more (three dots down) icon next to the name of each column. Just like the “Add Filter +” feature, clicking the “Add Column” button will open a drop-down menu with a search bar at the top.
Journal Reader
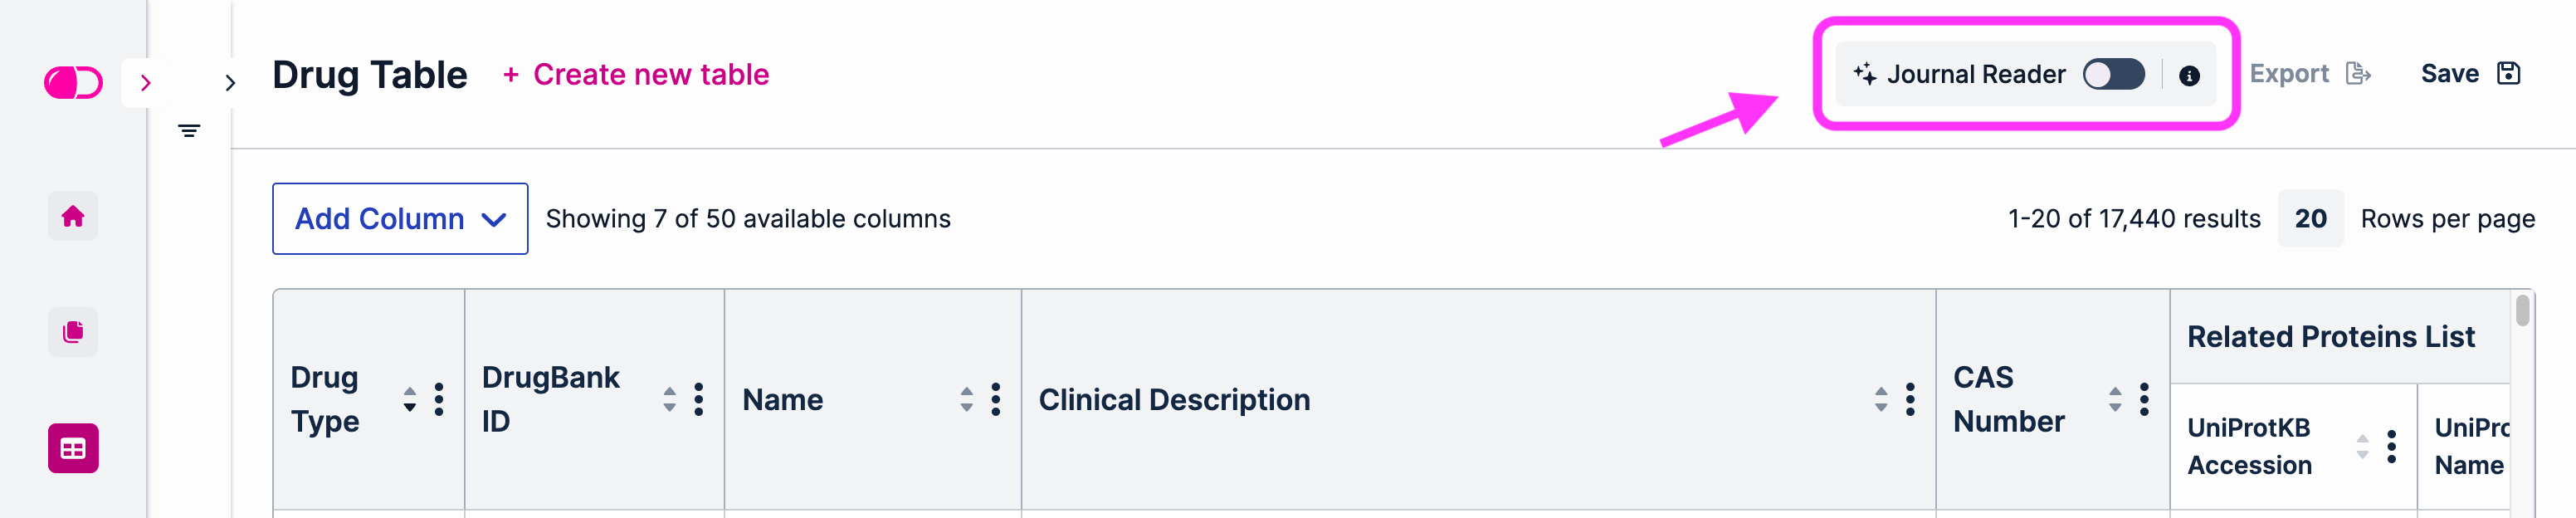
Machine-curated data can be added to the DrugBank Table Builder through a feature called Journal Reader. This feature can be toggled on or off using the Journal Reader button at the top of the page:
Journal Reader uses AI to pull information from PubMed articles, allowing users to view the latest trends in drug discovery and pharmaceutical research. Given the increasing number of research papers published each year, this feature provides DB+ users with a competitive edge.
The Journal Reader was developed as an additional source of information to supplement the human-curated data already available at DrugBank. The machine-curated data provided by the Journal Reader is also evidence-backed and links out to the original reference for further review.
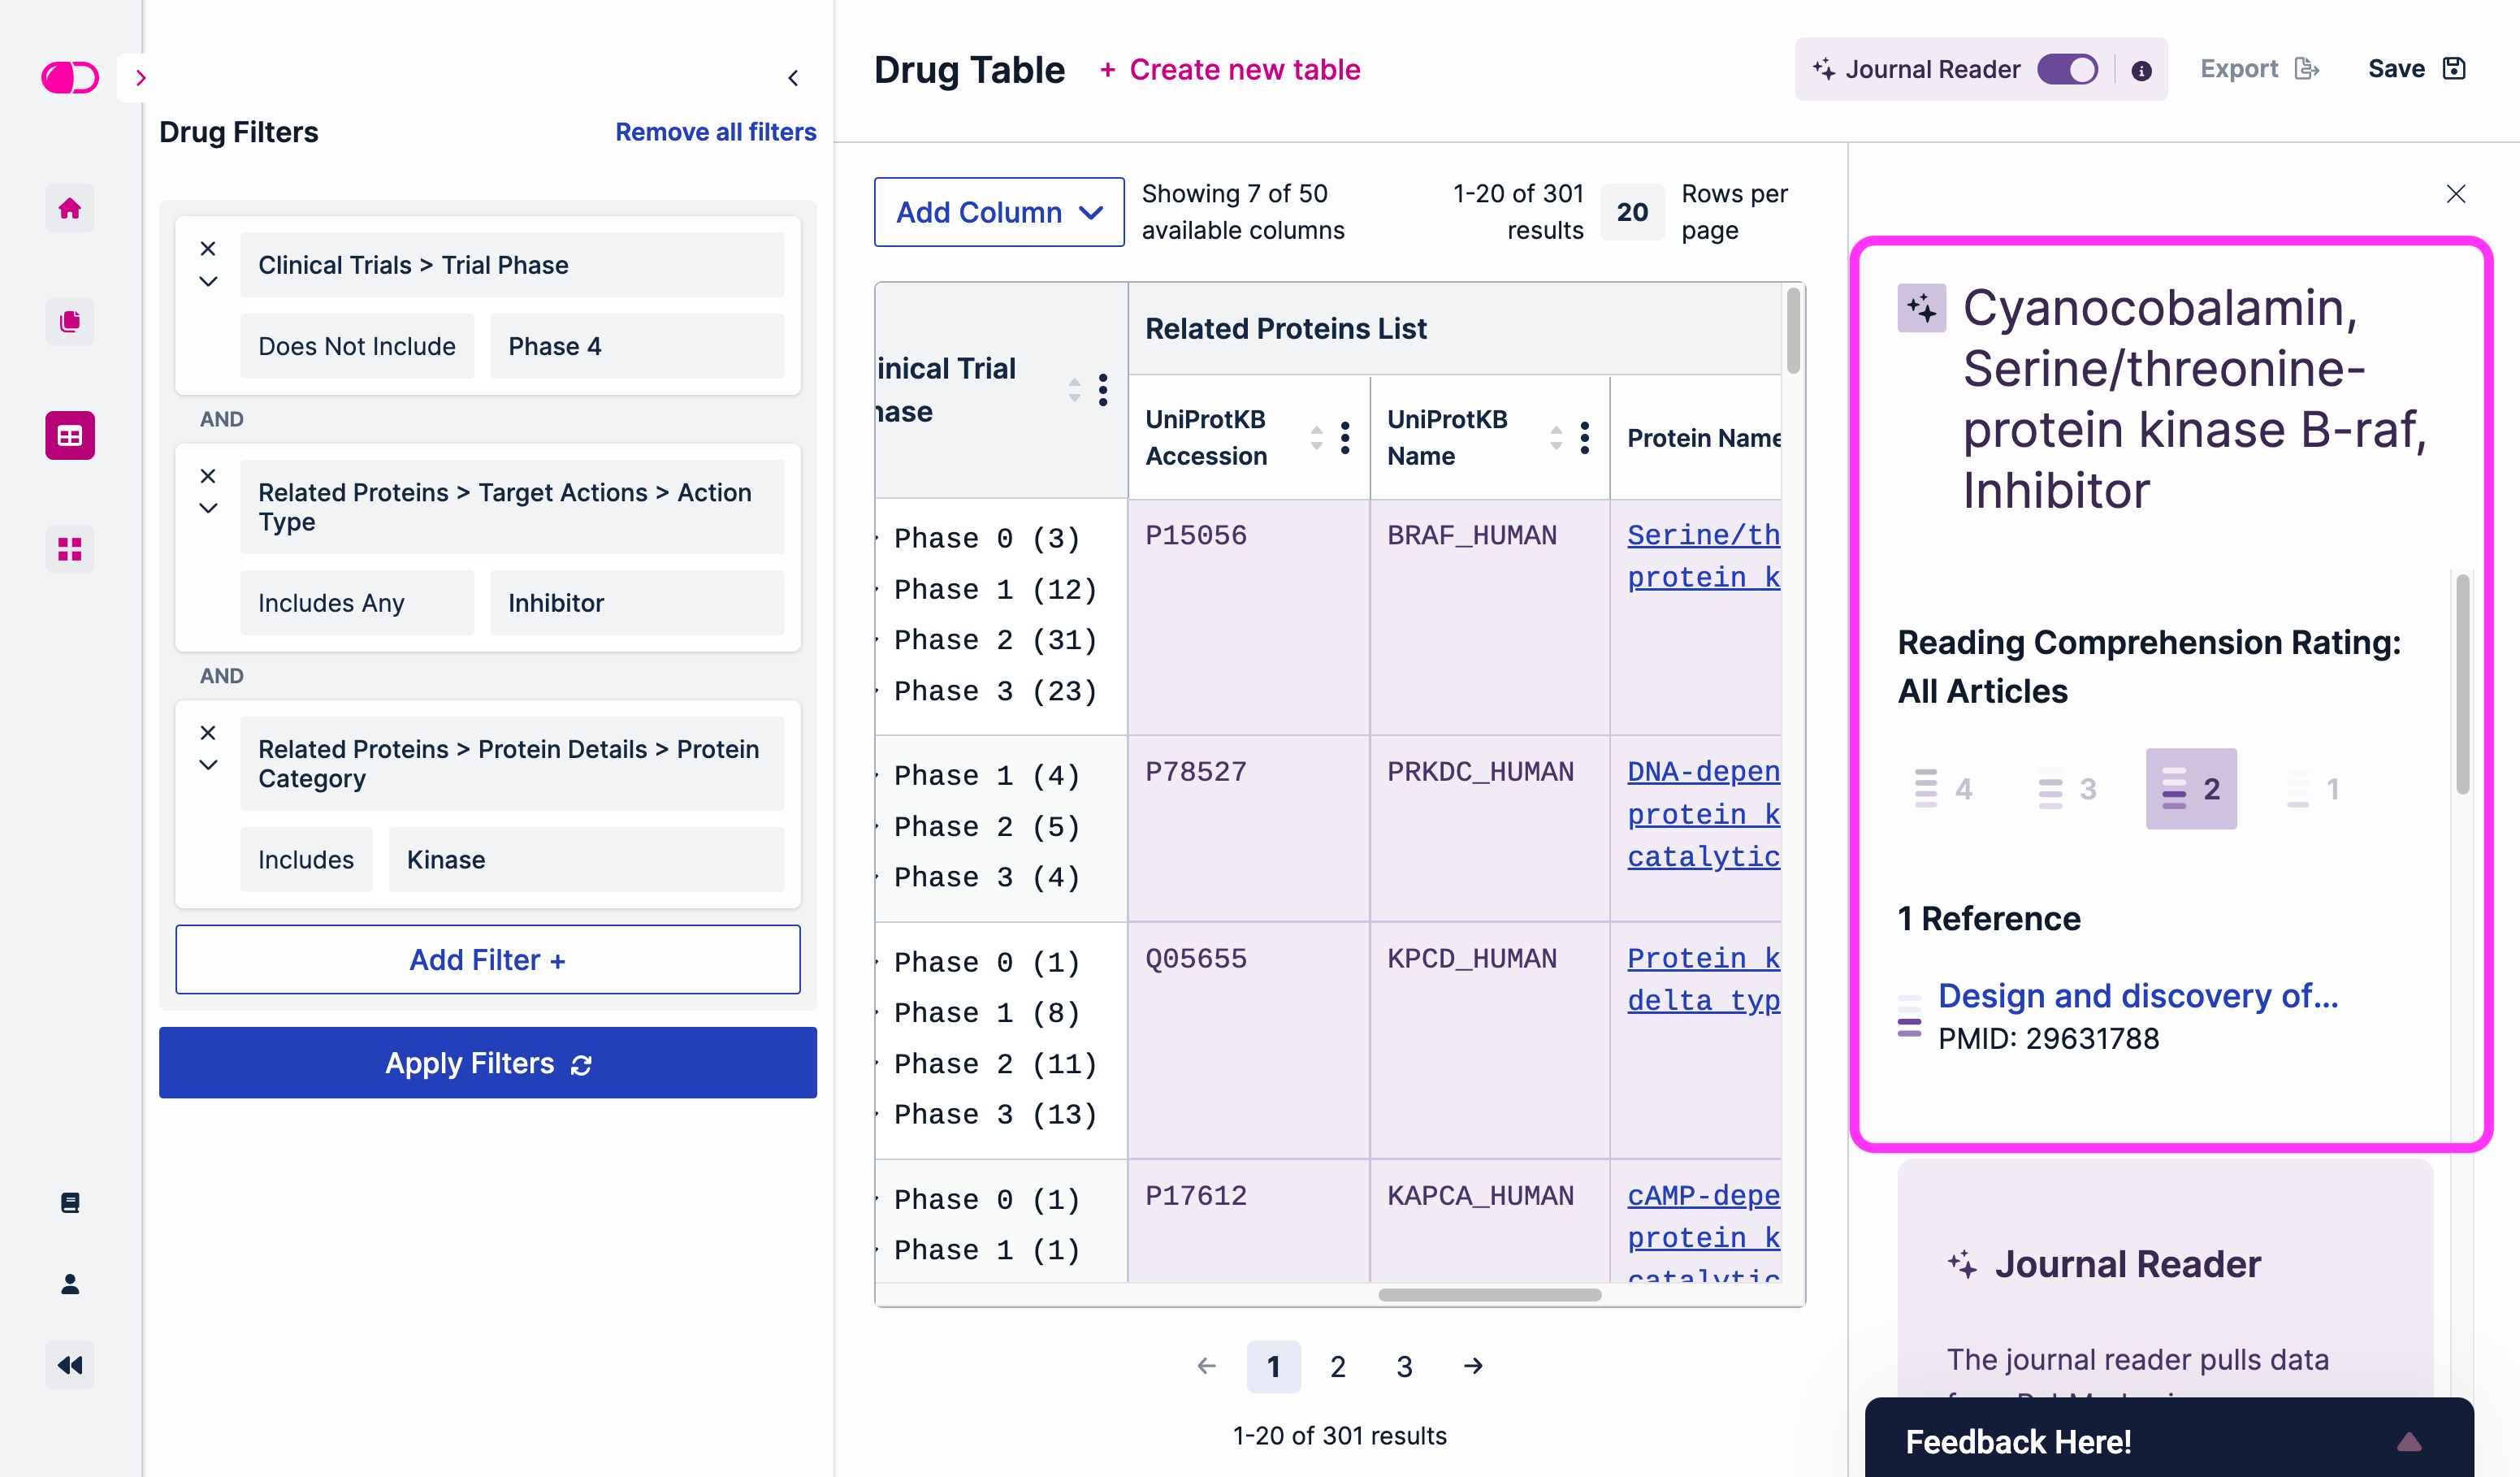
A four-point scale reading comprehension rating (RCR) serves as an indication of the level of confidence the machine learning system has in its own comprehension of the source text. The ratings go from 1 to 4, with 4 representing the highest level of confidence. The query results below show an example of how Journal Reader data is displayed:
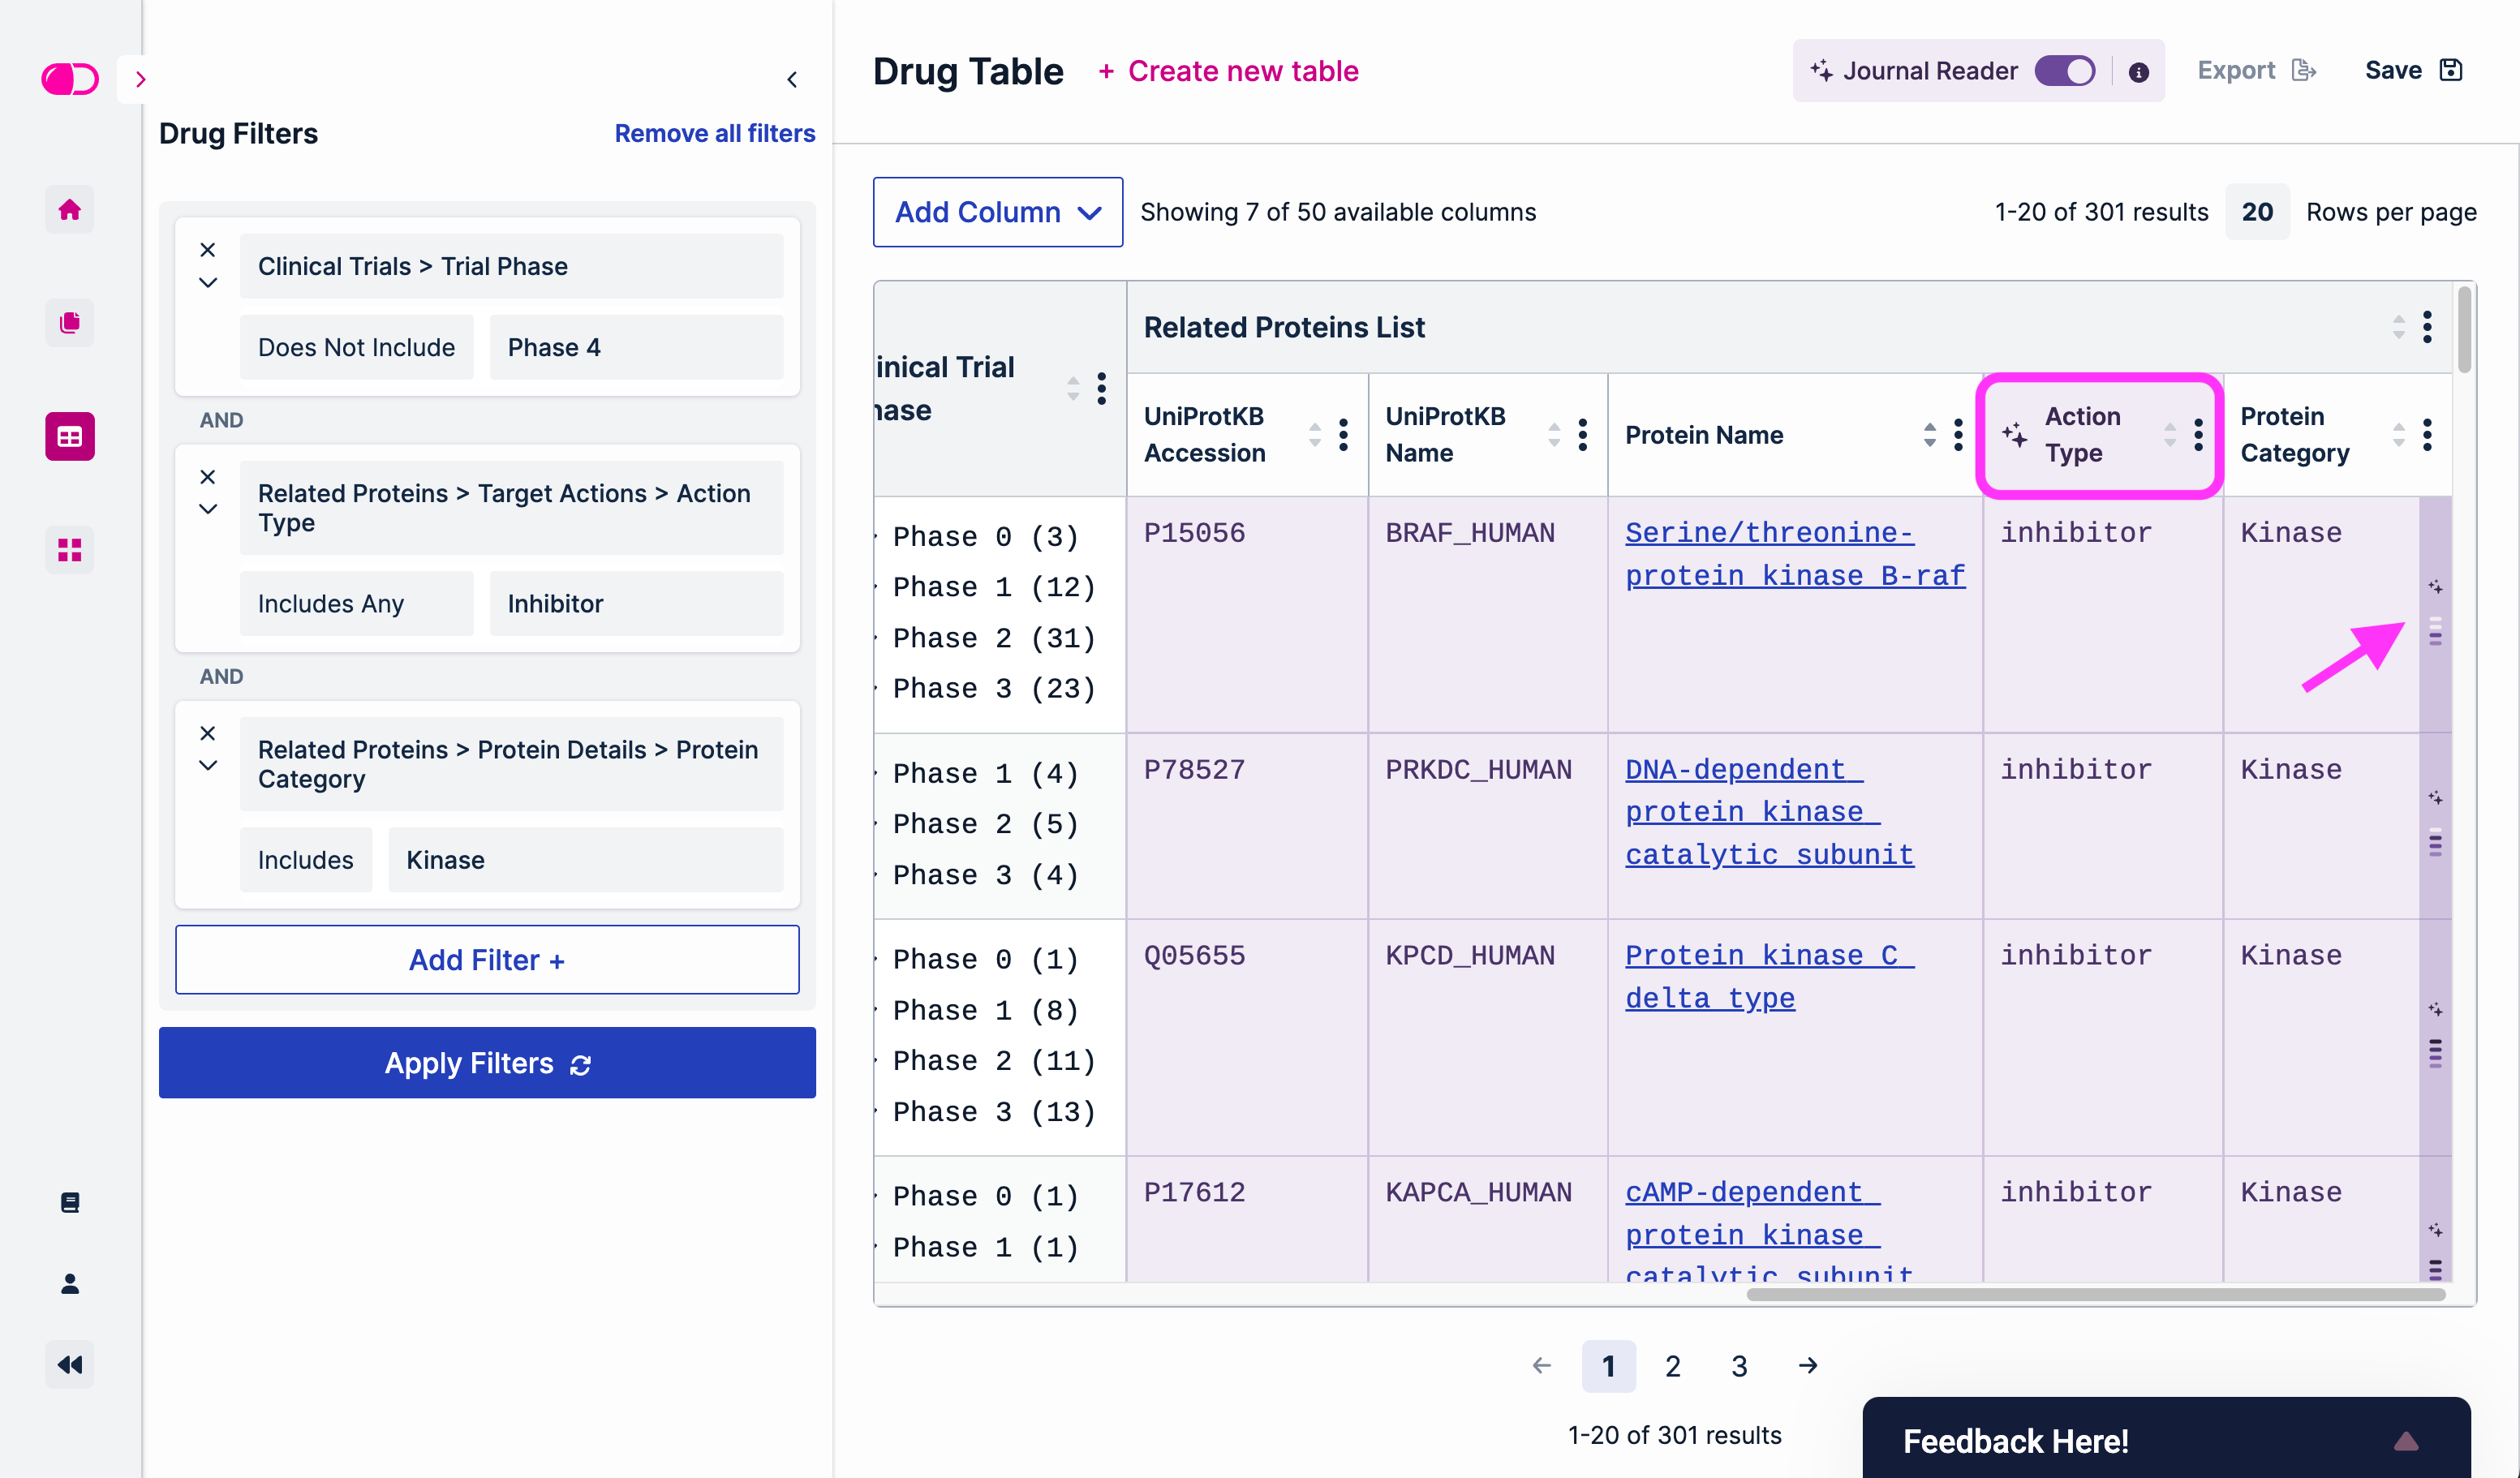
Here, we filtered out kinase inhibitors that have not yet reached phase 4 clinical trials. Toggling on the Journal Reader will show additional information highlighted in purple. The sparkle (✨) icon in the Action Type column indicates that this is machine-curated data. The arrow points toward the RCR icon displayed in a darker shade of purple. Hovering over it will show the rating, and clicking on it will open a side panel that includes links to the PubMed papers from which this information was pulled:
Filters for which the Journal Reader feature is available can also be easily identified with the sparkle (✨) icon:
Save and Export
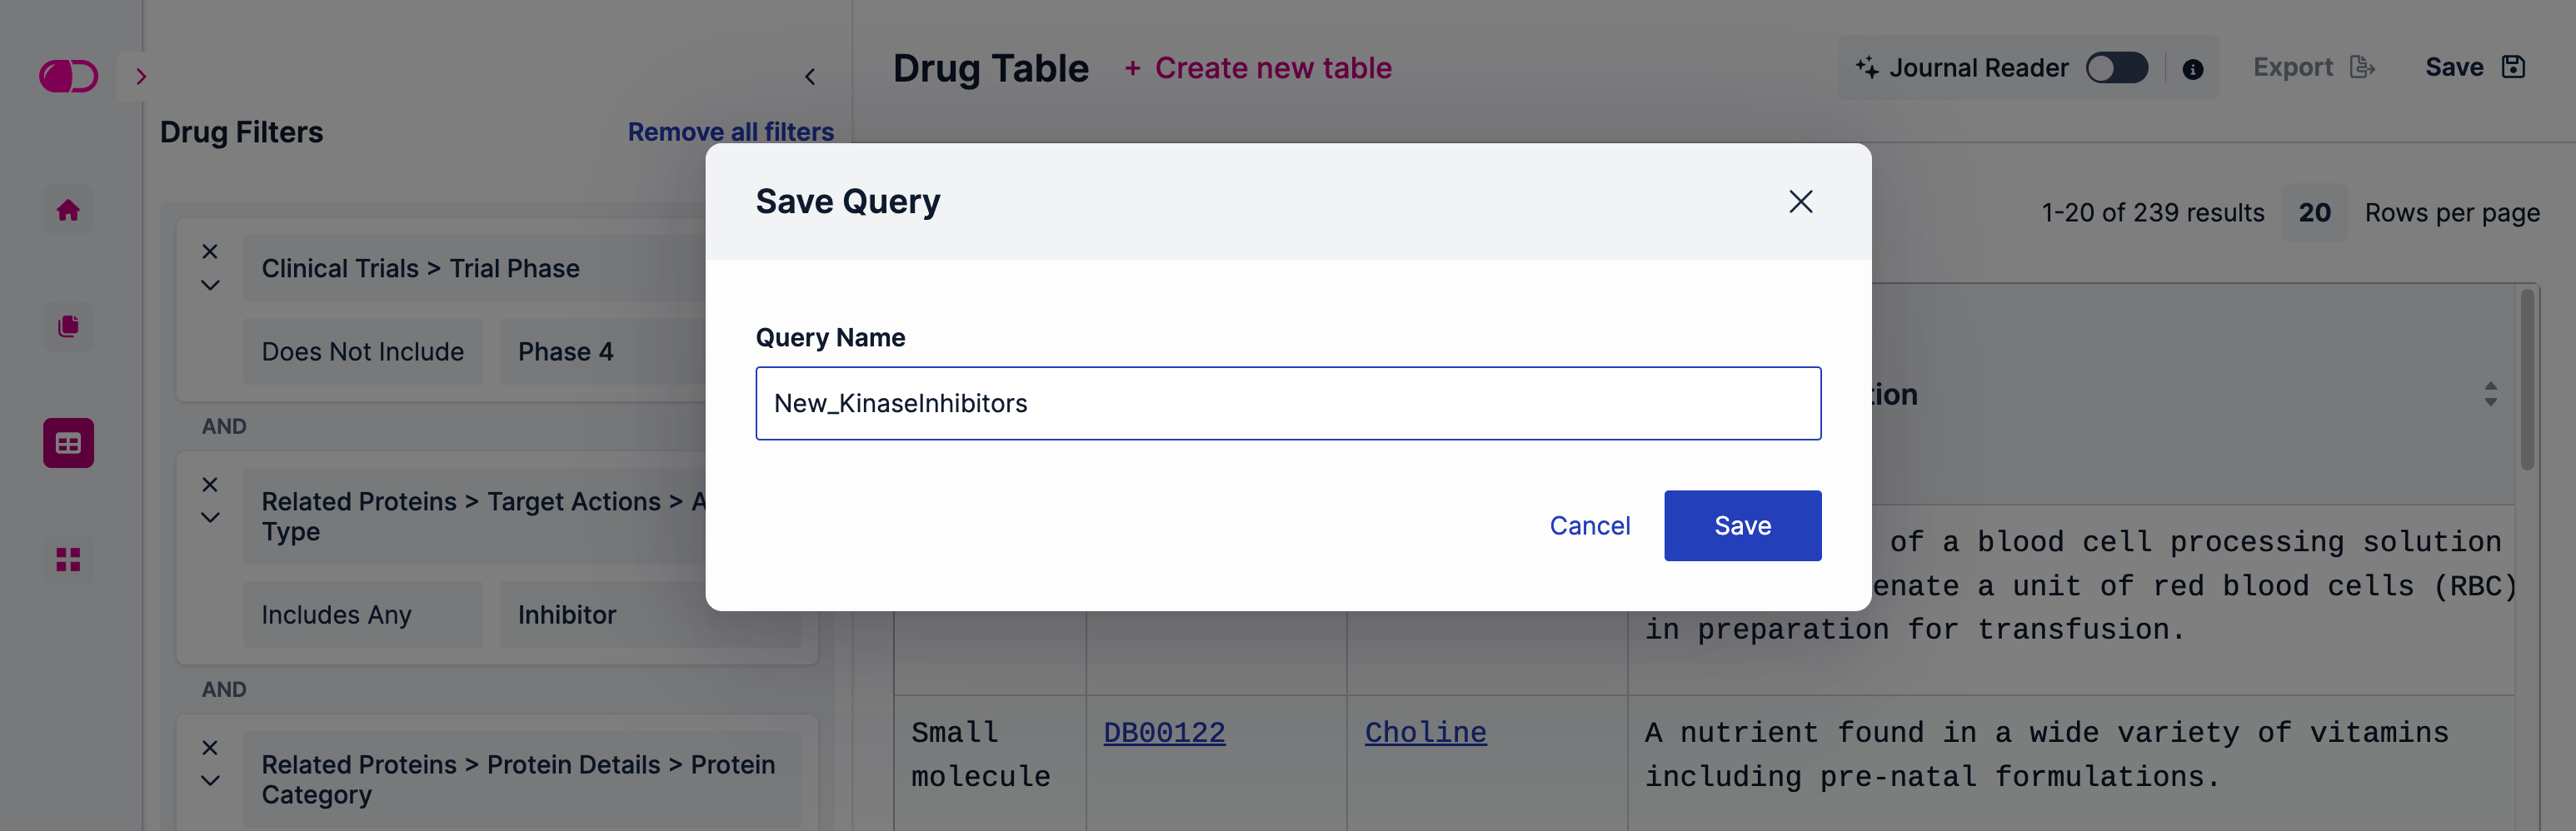
Saving tables allows users to reload commonly used parameters or settings to build a table, without having to re-select filters and columns. To save a table, click the “Save” button at the top right corner of the Table Builder. This will open a window asking users to assign a name to that table:
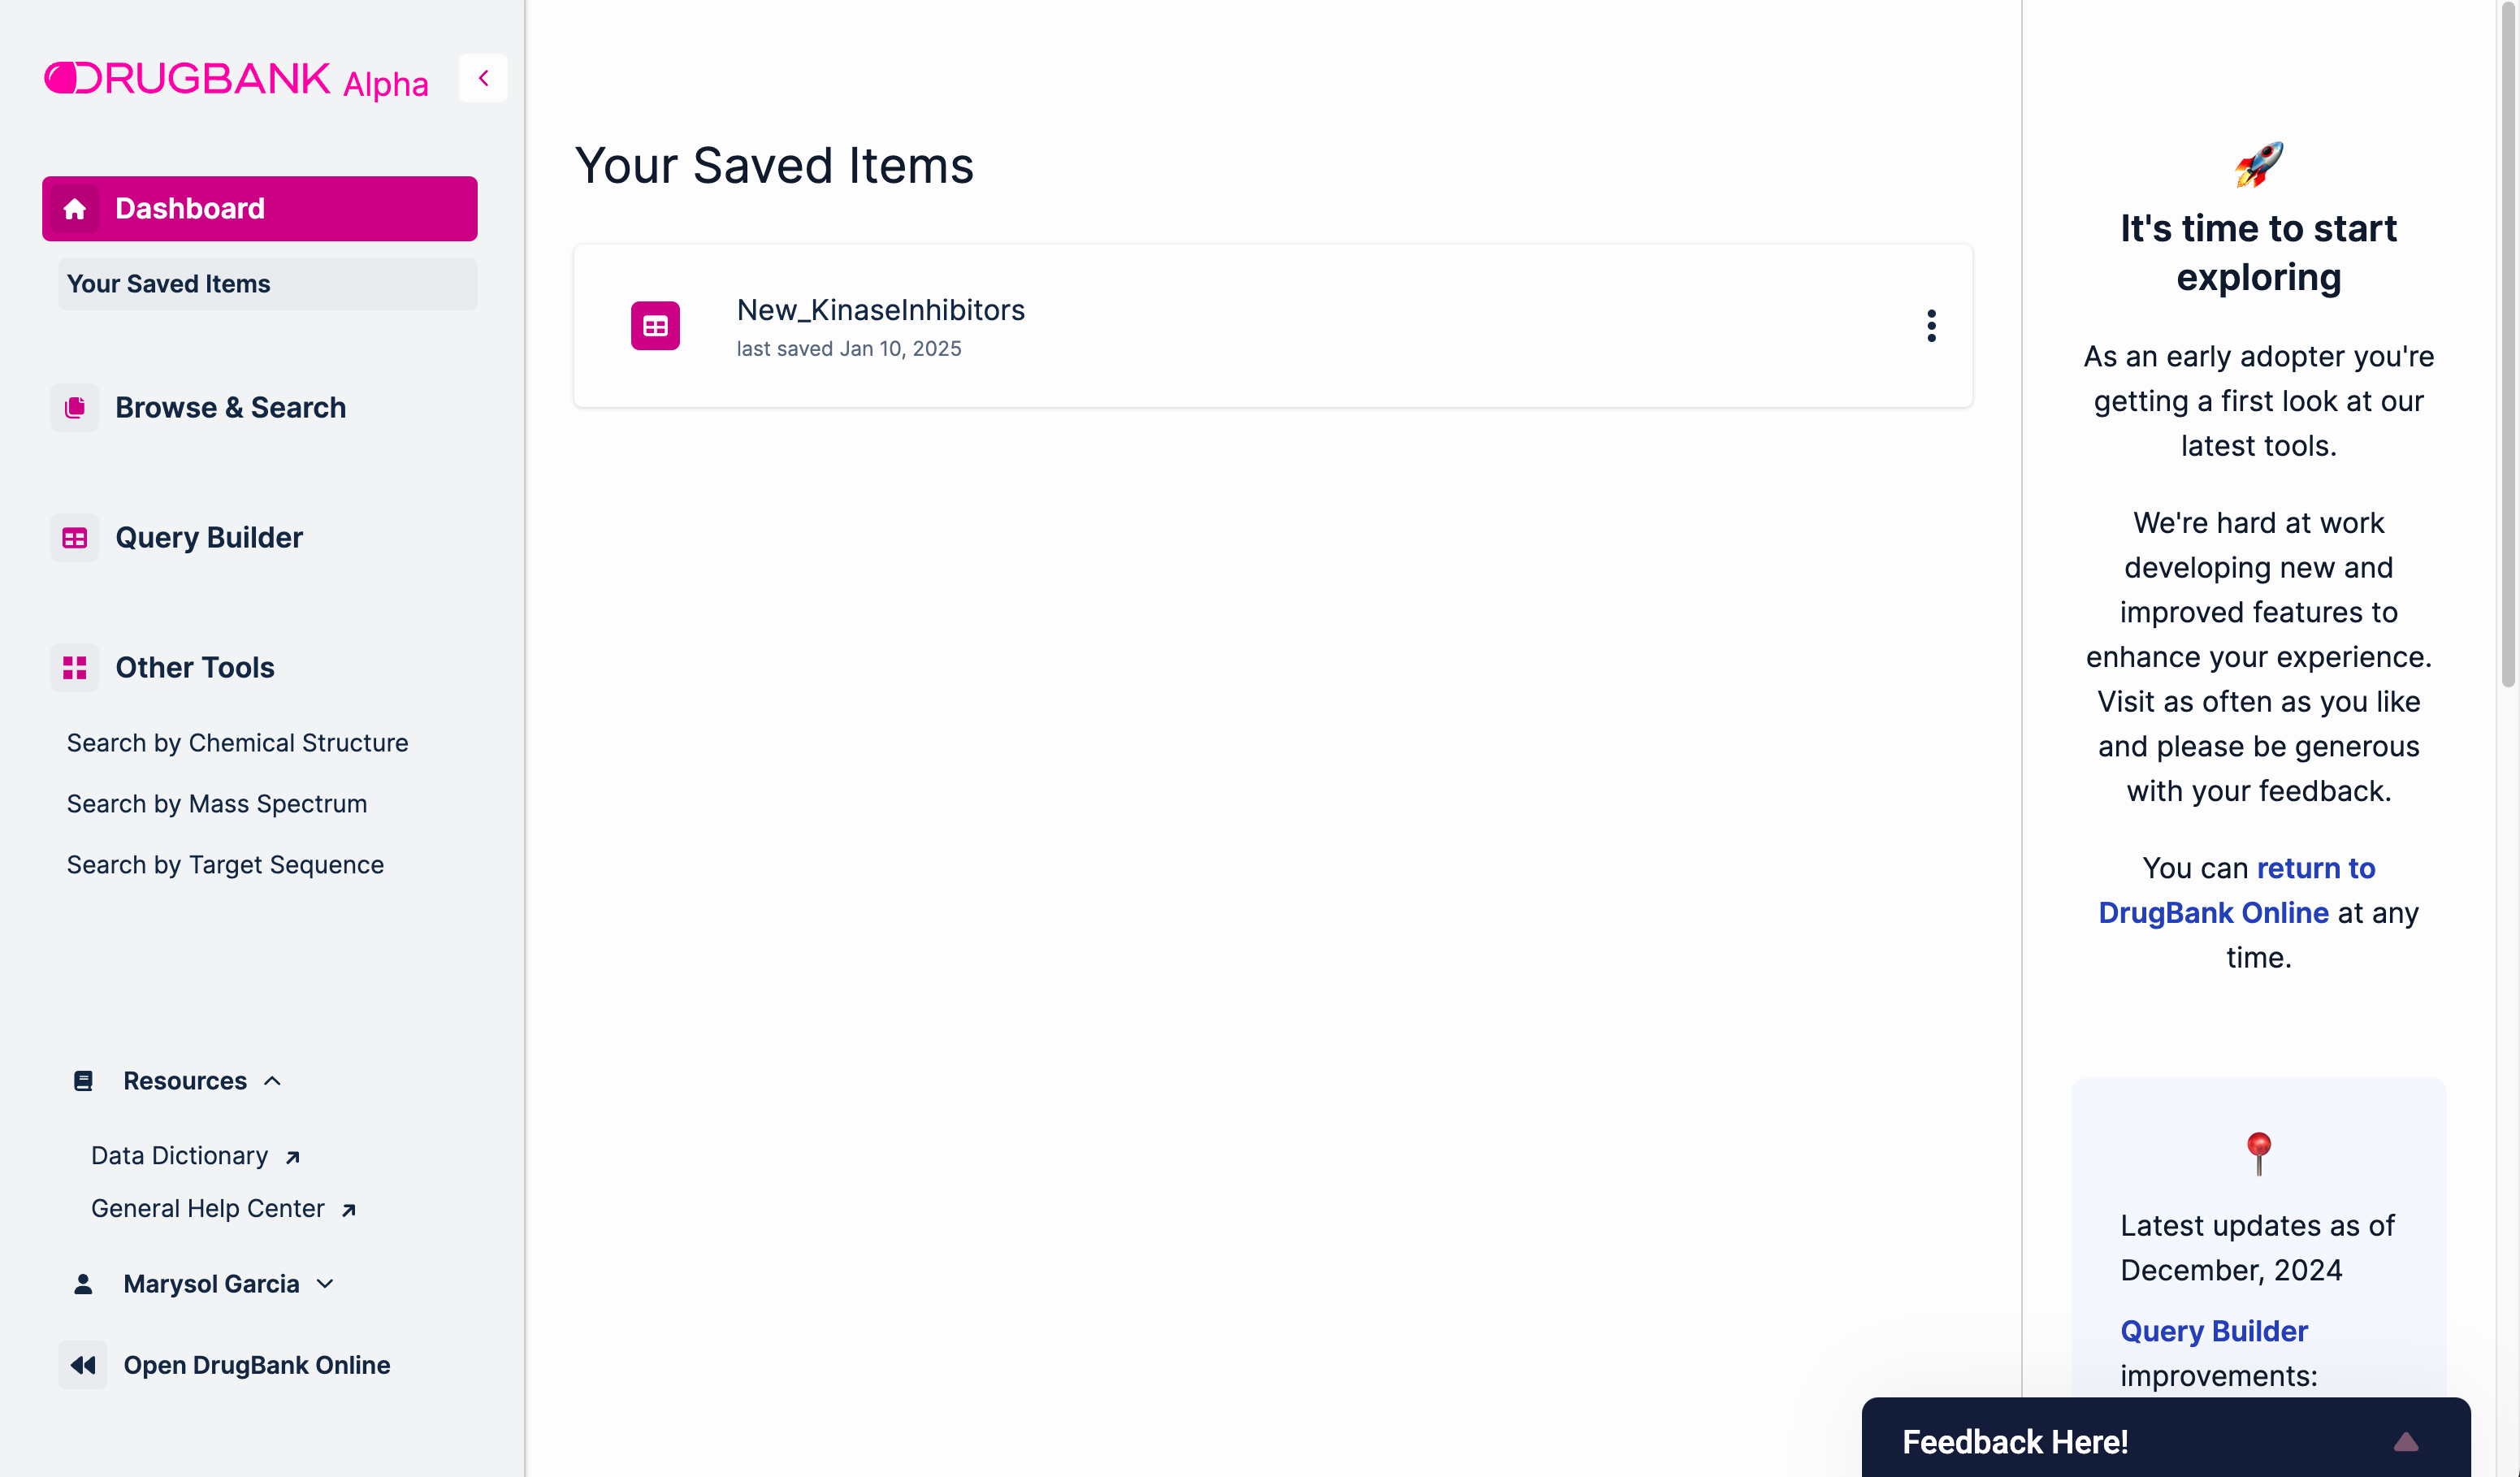
To view saved tables, go to “Your Saved Items” in the sidebar menu. The more (three dots down) icon next to each table gives users the option to rename, duplicate or delete tables.
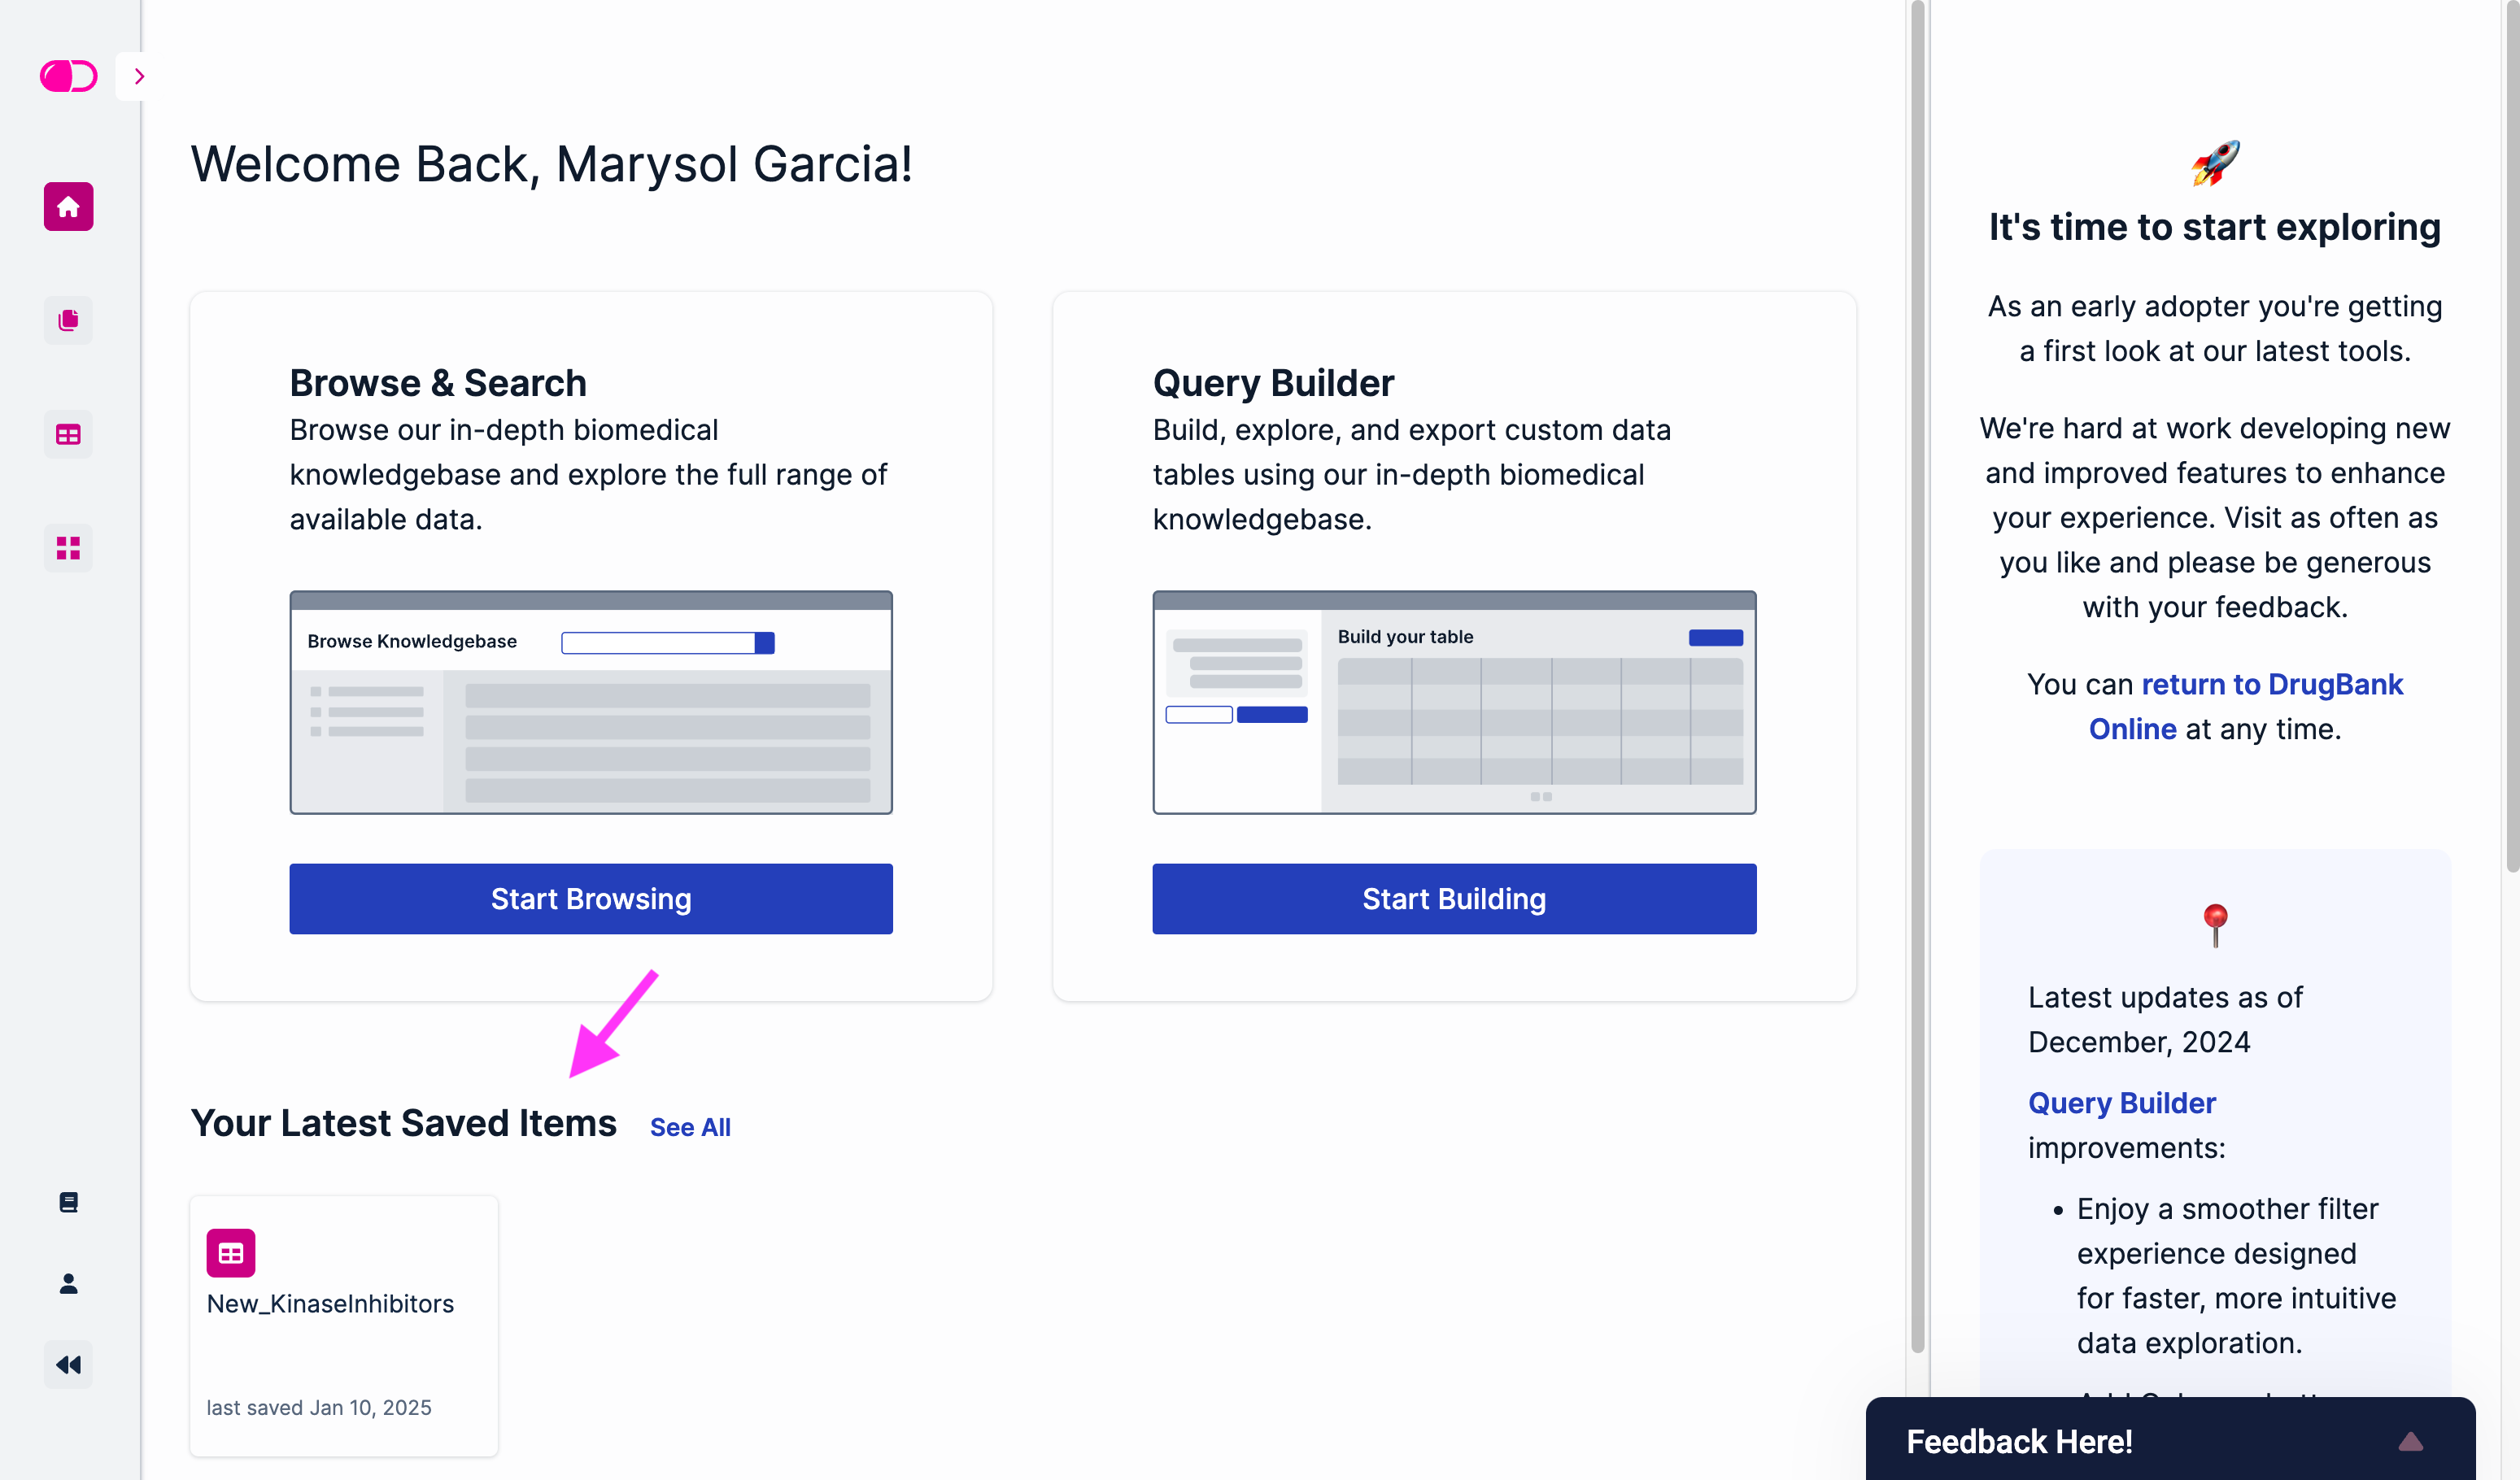
Additionally, the latest saved items can also be found in the main DB+ dashboard:
Export: TBA